Friday, 30 October 2015

CGA Gemplay and Interactivity Lesson 6 - Doors opening and Closing.

Today out teacher went through a tutorial on how to open and close a door using scripting, it was almost like a animation but very different process.

We had to add a trigger box to indicate the area for the doors to open ( we made them open to the sides ) and close when we leave the area almost like a automatic door in real life.

This was the start of our scripting with a few things added in.


 We then added the transformation of the doors to where they would move but when we enter the trigger zone, it looks like the doors would teleport to the position we want it and back to the original position when we leave the zone.


So we changed it a bit to make it move almost in real time instead of it teleporting.


Then did the same when closing.

We then deleted a few things right at the bottom of the script because we didn't need them any more as there was another lined scripted above it functioning the same as the lines just deleted and replaced them with some audio files for some music when we enter the zone and the doors closing and opening.


Wednesday, 28 October 2015

Life Drawing Session 6

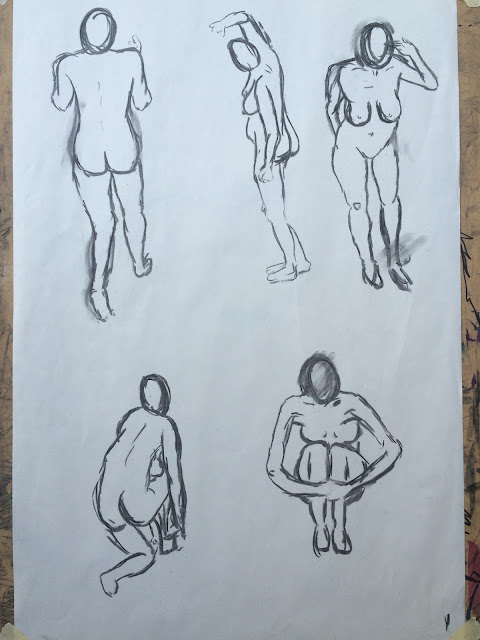
Today we did the usual 5 minutes drawing of 5 quick poses.


We then had to use charcoal and another type of media, I chose a orange marker.We had to do 2 drawings having 15 minutes between them. So we had to look at our model and draw using both our hands simultaneously using the charcoal and our other media we choice.  I found it quite difficult as we had to look at our model and look both of the drawings and as you can see I kind of prioritised my right side more than my left.


Then we moved onto 30 minutes drawings ( we did 2 drawings ) focusing more on the posture and detail of out model.

First drawing. I liked this one a lot because it's the best drawing I have done so far; the posture and shape and the size of the body parts look good as well  look good in my opinion apart from the chair.


Second Drawing. For this one we were only aloud to using different tones of shading to make out our model.


Tuesday, 27 October 2015

CGA 3D Art Production Lesson 6 - Foliage

We followed another tutorial but this time in out own time as we ran out of time in the lesson.

It was to learn how to use foliage to create grass or tree branches. So I got a side view shot of a batch of grass.


I then went into the Channels and added a alpha channel. Then went back to my normal layer which add the grass on, held ctrl and left clicked the layer to select the image within the layer. Then switched back to the channel Layer and filled it in with white.


The parts in white we can see when we take it into unity and the black background will be blank.


So I took it back into Unity and applied the texture on a plane which I rotated 90 degrees in the y axis to make it face us.


Then simply duplicated the plane again creating the illusion like its real.


CGA 3D Art Production Lesson 6 - Mushy's (mushrooms)

In today's lesson we had to follow a step by step tutorial shown by our teacher on how to model and paint a mushroom on Maya 2016, we also had a open document if we got lost or fell behind.

First of all,we modelled our mushroom.


Then we took a UVsnapshot and make it a Targa file and opened it on Photoshop.


we then processed to colouring the parts in on separate layers and added detail to them such as the moss and white round circles and such.


Then added some Radial Gradient.


We then went back into Maya 2016 and opened up Hypershade and assigned the Targa file onto a lambert.


Then assigned the texture onto our mushroom.


I also did another one but in another colour using the same UVsnapshot although I did change the shape of the mushroom after applying the texture which is bad because I can see the UVmap with change and the texture will not really match.


Here are both of them together.


Monday, 26 October 2015

CGA Visual Design Lesson 6 - Zombie! (Halloween Special)

In today's lesson we were given a 3D female model in Maya 2016 and a Photoshop layout of the different structures of the girls texture.


So we had to change a few things to make her look for like a zombie and add some extra stuff such as a different texture or pattern on her jacket and such.


Here is the layout that I ended up with, I was quite sure what kind of themed zombie I wanted such as the type of clothes and other things. In the end I decided to do a girl that as gone on holiday in a tropical area but sadly came at the wrong time and turned into a zombie.

It was really fun and there was so much more I could have done like adding more blood splats on her jacket and trousers but over I think it ended up pretty good.


Saturday, 24 October 2015

CGA Visual Design - Lava monsters

MoodBoard


For extra work we had to do out side of out visual design lesson was to use the technique we developed in the lava lesson to come up with 3 different lava concept monster and pick the best one we had and use the same technique we used in class to colour it in

Concept 1.


 Concept 2.


Concept 3.


 Final.

I decided to do concept 2 as the final piece because I liked the body shape of it the most and the concept of it holding its own head in its hand like its been knocked off but its still alive and walking.
I had a bit of trouble trying to get the right background colour as the monster itself is pretty dark compared to the contrast of the lava so tried not to over do it that you can even see the monster any more.

Over all it was very fun to do and I could maybe dim down some of the lava as it seems like there is a bit too much on the monster but I really wanted it get the glowing effect on it which I developed in class but adding the lava like style and then using the soft round pressure opacity brush to rub out the lava leaving behind the red kinda of glow instead of it being a direct lava source.

I also developed some technique such as how to add drips and where lava should run down from varies cracks and other sources.